

Beefhammer Taco's
 Winner 2024
The Beef Hammer is a bold cut of meat that needs to be cooked low and slow, making it the perfect Sunday BBQ project. It is the ultimate BBQ braising meat for pitmasters. And most importantly: the end result — pulled beef — is incredibly flavorful and can be used in all kinds of dishes. So make plenty, freeze some and enjoy it again later. Siebe Grijpma from @bbqmoods used it to make these delicious tacos.
Beef Hammer taco summary
- Indirect cooking
- Dome temperature: 120 - 140 degrees Celsius
- Preparation time: 15 minutes
- Cooking time: 10-11 hours
- Serves: 4-5 people
Beef Hammer recipe
First things first: take your time. Preparing this Beef Hammer easily takes around 10 hours, so if you want to eat it in the evening, you will need to get up early and fire up the BBQ. Because the Beef Hammer is such a large cut of meat, it also takes quite a while to thaw. Make sure to remove it from the freezer at least 2 days in advance. The preparation already starts the evening before, so proper planning is half the work.
Preparing the Beef Hammer
Once your Beef Hammer has thawed, you can start cleaning and seasoning the meat the evening before cooking. Remove the hammer from the packaging and use a sharp knife to trim away all connective tissue and silverskin. These parts are tough and will not become tender, so make sure to remove them.
Once the Beef Hammer is cleaned, tie butcher’s twine around it in 3 places. This prevents the meat from falling apart once it becomes tender and fully cooked. Now grab your favorite beef rub and apply a generous layer all over the Beef Hammer. I used the Beef Rub from Silly Tony, but choose whichever rub makes you happy. Wrap the meat tightly in cling film and place it in the refrigerator overnight. Then get up early the next morning to fire up the BBQ!
Smoking the Beef Hammer 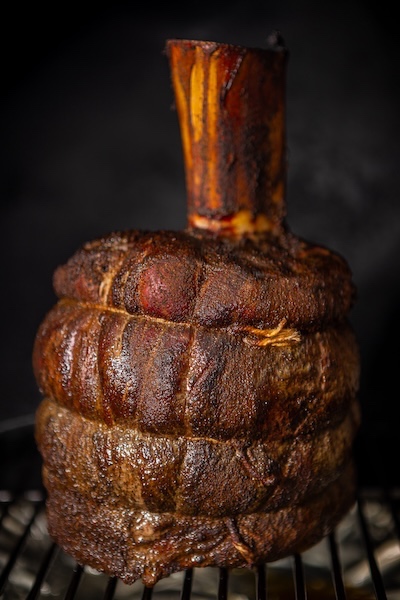
Get up early because this will be a session of around 10 hours. Bring your BBQ to 120 degrees Celsius and set it up for indirect cooking. Also place a drip tray underneath because fat will drip from the Beef Hammer and we want to reuse that later during the wrapping stage. Once the BBQ reaches temperature (120 degrees Celsius), add your smoking wood. I used two chunks of oak. Check regularly whether there is still enough smoke in your BBQ. If not, add another chunk later on. In total we want about 4 hours of smoke. Place the Beef Hammer on the grill away from the heat source and optionally insert a core thermometer.
Let the meat smoke for 4 hours at 120 degrees Celsius. After the first hour, check whether the seasoning has properly adhered to the meat and formed a bark. If it already looks dry, start spraying it with your apple juice/apple cider vinegar mixture. Repeat spraying every half hour. The acidity helps tenderize the meat and prevents it from drying out.
The internal temperature during these first four smoking hours is not very important. The meat absorbs smoke best while the core temperature remains below 70 degrees Celsius. After 4 hours at 120 degrees Celsius, my core temperature was around 65 degrees. Time to wrap.
Cooking the Beef Hammer 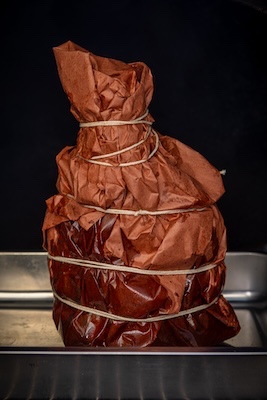
We wrap the meat in butcher paper, although aluminum foil also works. Make sure all the fat collected in the drip tray is reused during wrapping. Add a few knobs of butter and some extra rub or seasoning. Spray the Beef Hammer once more with the spray mixture so there is enough moisture and flavor before sealing the package. Wrapping is a bit tricky because of the shape, but since we tie it again with butcher’s twine, perfection is not necessary. Just make sure the bottom is relatively sealed so fat and juices do not leak out too easily.
Now insert a core thermometer into the thickest part of the meat. Be careful not to place the probe in a large fat pocket or against the bone, otherwise you will get inaccurate readings and may remove the meat too early or too late from the BBQ.
Place the wrapped Beef Hammer back on the BBQ in an oven tray or drip tray, again using indirect heat. Raise the dome temperature to 140 degrees Celsius. We use the tray because juices and fat will continue collecting inside the package. We want to reuse these flavorful juices later to baste the Beef Hammer or enrich the pulled beef.
We are aiming for a core temperature of approximately 95 degrees Celsius. For me, the meat reached 95 degrees after around 5.5 hours in this second stage and was perfectly tender. The best way to determine tenderness is by probing the meat with a thermometer or skewer. If it slides in like butter, it is ready to come off the BBQ. Once you unwrap the package, you will notice the meat has pulled back from the bone. Be careful when moving the Beef Hammer because it will now be extremely tender. Leave the butcher’s twine attached.
Remove the butcher paper and collect all juices and fat from the package into the tray. Place the Beef Hammer back on the BBQ and use a brush to baste it with the collected juices. This adds even more richness and flavor. After 15 minutes of drying on the BBQ, the Beef Hammer is ready to be pulled.
Making pulled beef
Once the Beef Hammer has cooled slightly, it is time to pull the meat apart. Remove the butcher’s twine and pull out the bone. Carefully shred the meat using forks, Bear Claws or simply your hands with gloves. If there is still some juice and fat left in the tray, add a little to the pulled beef for extra flavor. Save some of it as well for frying the tacos later.
The next step is making the tacos.
Making Beef Hammer tacos
Now that the pulled beef is ready, it is simply a matter of frying tacos. Make sure your favorite toppings are ready on the table. I used tomato salsa, homemade guacamole, iceberg lettuce, jalapeño slices, jalapeño relish and crème fraîche.
We fry the tacos in a skillet. Remove them from the package and lightly brush them with the Beef Hammer fat from the tray using a pastry brush.
Place your skillet over medium heat. Lay a greased taco in the pan and lightly fry it. Flip it over and add some grated cheese together with a strip of pulled beef in the center. Fold the taco closed in the pan and gently press it down with a spatula. The melted cheese will help hold the meat in place. Flip once more and briefly brown the other side as well. This only takes a very short time, less than a minute. Place the taco on a plate, open it slightly and add your favorite toppings.
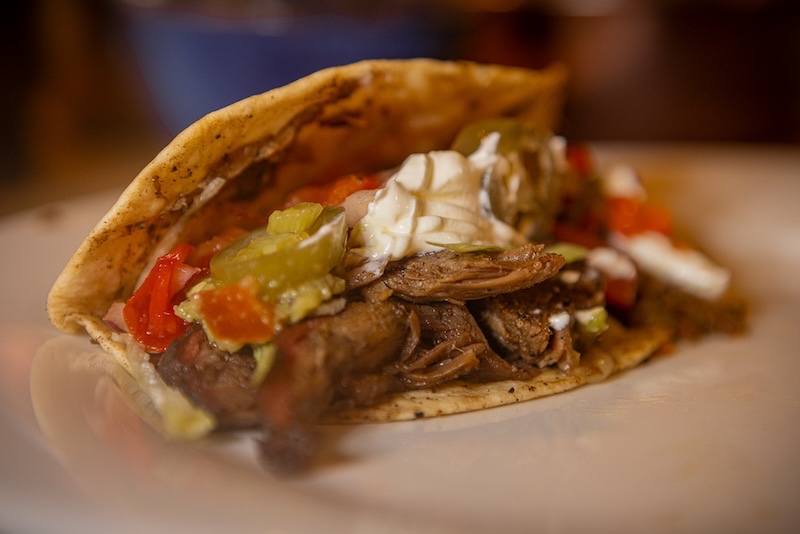
ENJOY!